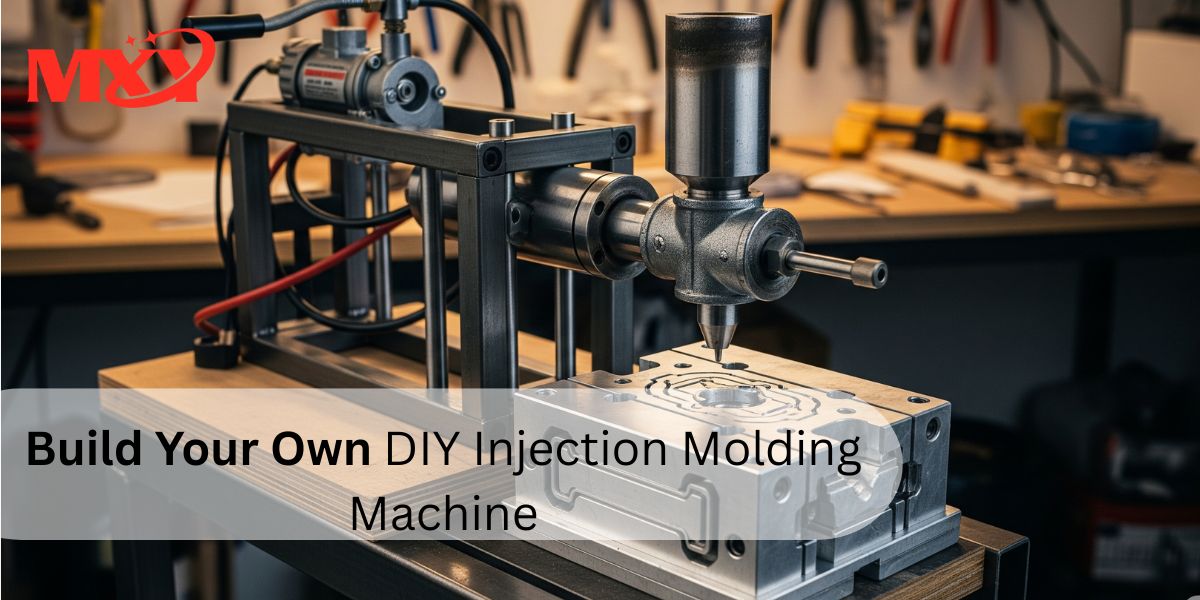
DIY Injection Molding Machine can be created at home which helps in producing the plastic part without using the factory. Are you interested in low volume injection molding, prototyping or figuring out how the industrial machines work? This guide takes you through the steps to do it. It is cost-effective and is suitable for small-scale production.
What Is a DIY Injection Molding Machine?
DIY Injection Molding Machine is a small machine which is designed to melt plastic and inject it into the molds. Unlike large factory machines, this version is made with affordable parts. It helps hobbyists and small businesses make their own plastic Injection mold parts. This is useful for Prototype Injection Molding or testing new ideas without high costs. Injection molding manufacturers often use expensive machines. A homemade machine gives you hands-on experience without needing a big budget.
Benefits of Building a DIY Injection Molding Machine
- Cost-effective for small runs
Great for learning how injection molding works - Ideal for low volume injection molding
- Allows quick prototyping
- Customizable based on your needs
Creating your own machine also gives you freedom to control the materials, shape, and design of your products.
Parts Needed to Build the Machine
These are some key components and their purpose. Most of these materials are available in hardware shops or online.
DIY Injection Molding Machine Components
| Component | Purpose |
| Heated barrel or nozzle | Melts the plastic pellets |
| Frame (metal/steel) | Supports the whole structure |
| Manual press or lever | Injects molten plastic into the mold |
| Temperature controller | Regulates heating temperature |
| Mold (aluminum or steel) | Holds the shape of the plastic part |
| Thermocouple sensor | Measures barrel temperature |
| Power source (110V/220V) | Supplies electricity to the heater |
| Hopper | Holds the raw plastic pellets |
You might already own some equipment such as pliers, screwdrivers or even welding equipment. Otherwise you will have to acquire them also.
Steps to Build a DIY Injection Molding Machine
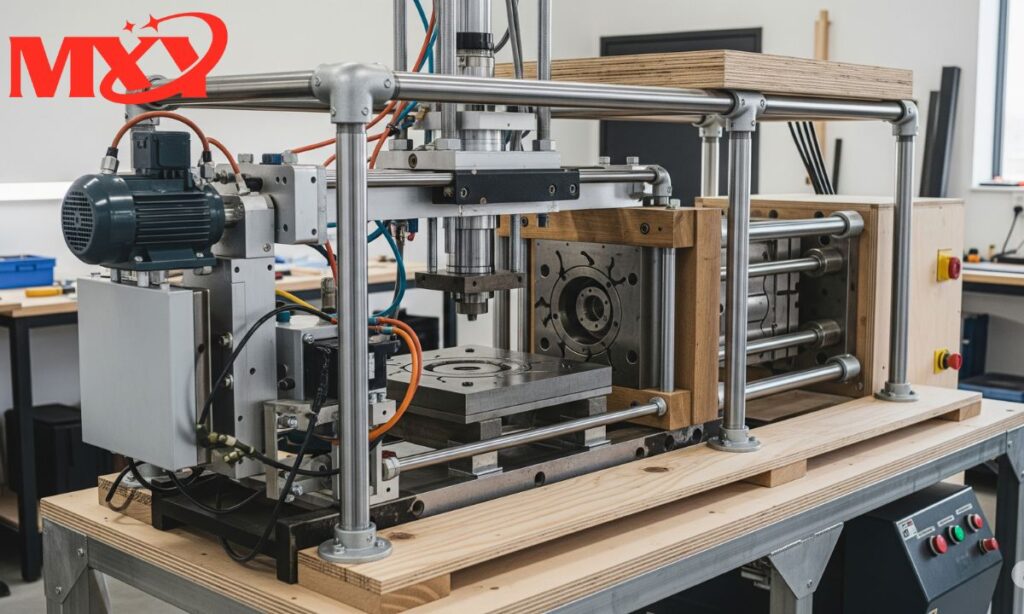
Design the Frame
Support your machine using a high-quality aluminum or steel frame. Ensure that it is very stable and can work with pressure and heat.
Install the Heated Barrel
Fix the barrel to the frame. Join the heating elements and thermocouple. The temperature controller will manage the heat level.
Connect the Manual Press
Fix the press mechanism in place. This can be a hydraulic jack, toggle clamp, or lever. The press must apply enough force to push melted plastic into the mold.
Setup the Mold
Secure the mold below the barrel. Make sure it fits tightly so the plastic won’t leak. You can use a two-part aluminum mold for simple shapes.
Test the System
Add plastic pellets to the hopper. Heat the barrel until the plastic melts. Use the lever to inject it into the mold. Wait for it to cool, then open the mold and remove your part.
This is the basic process followed even by injection molding manufacturers, though on a much larger scale.
Materials You Can Use for Molding
Most DIY machines work best with thermoplastics. These plastics melt when heated and harden when cooled.
Best Plastics for DIY Injection Molding
| Plastic Type | Melting Point | Common Uses | Recyclable |
| Polyethylene (PE) | 120–180°C | Bottles, containers, toys | Yes |
| Polypropylene (PP) | 130–171°C | Hinges, caps, automotive parts | Yes |
| Polystyrene (PS) | 100–120°C | Models, CD cases, packaging | Yes |
| ABS | 200–240°C | LEGO bricks, electronic housings | Yes |
These materials are widely available and cheap. ABS is excellent for prototype injection molding due to its durability.
Applications of DIY Injection Molding Machine
A homemade molding machine can be used in many areas:
- Rapid prototyping
- Small-batch production
- Hobbyist projects
- Educational use
- Making replacement plastic parts
Low volume injection molding is the main goal for most users. You can make 10–100 parts in a short time using this setup.
Common Challenges and Fixes
Plastic Not Melting Properly: Check temperature settings and heating coil.
Leakage from the Mold: Tighten mold clamps or check mold design.
Incomplete Filling: Increase pressure or temperature.
Parts Sticking in Mold: Better used is mold finish, or mold release spray.
Just keep testing and refining. Just like in injection molding manufacturers, your success will be based on tuning of the machine.
Tips for Better Results
- Use a digital temperature controller for accuracy
- Preheat the mold to avoid defects
- Maintain even pressure during injection
- Clean the barrel after every use
- Start with simple mold designs
With time, you can improve the machine or even motorize the process.
Cost of DIY vs Commercial Injection Molding Machines

A factory-made injection molding machine can cost from $5,000 to over $50,000. Building your own machine usually costs $200–$600 depending on quality and parts. If you’re doing low volume injection molding or testing designs, DIY is more affordable. For mass production, though, industrial machines are faster and more consistent.
When to Move from DIY to Professional Services
You might consider working with professional injection molding manufacturers if:
- You need more than 1,000 parts
- Tight tolerances are required
- You need parts with high polish or complexity
- You want automated production
But until then, a DIY setup is perfect for testing and learning.
Conclusion
The construction of a DIY Injection Molding Machine is an exciting challenge. It allows you the liberty to develop plastic parts at a low cost. Either as a hobby or business, it is a perfect tool to use in prototype injection molding and low volume injection molding. With simple materials and correct procedures it is possible to build a powerful machine in the garage or workshop. You will save your money and be able to know a lot about manufacturing of plastic parts
FAQs
What is the cost of a DIY Injection Molding Machine?
It typically costs 200-600 dollars, depending on the bought components.
Which plastic is usable?
Such thermoplastics as ABS, PE and PP are good.
Can I make complex shapes?
Yes, but you’ll need detailed molds. Using simple shapes first is a good idea.
Is it safe to apply at home?
Yes, when treated properly and having safety equipment such as gloves and goggles.
Can I sell parts made from DIY machines?
Yes, for small batches or prototypes. For large production, professional machines are better.